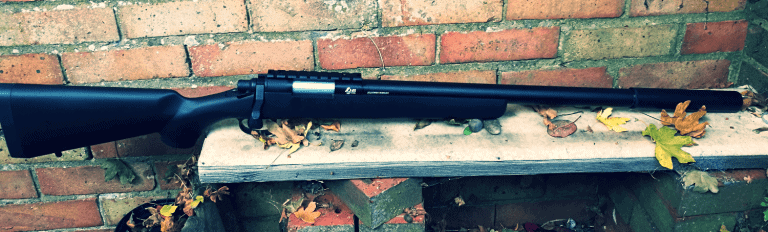
ASG AW308 Build
ASG AW308 Build Introduction:
So another popular sniper platform is the various L96 models which are based on the Maruzen APS-2 design/Type 96, With this one being the ASG AW308.
I thought this would be another good build as it’s generally cheaper than a VSR, they can perform quite well and the base guns aren’t to expensive.

ASG AW308 Initial Thoughts:
The rifle arrived in the usual style of ASG box and included one magazine. The rifle has some nice weight to it and I do enjoy the aesthetics. Build quality appears to be really nice, minimal seams on the body and everything seems to work well……

The rifle was clocking in at 400fps out of the box and was +/- 6fps variance which was ok for a stock rifle. One thing I like about the L96/AW308 models is the fact they funtion a lot quiter and usually come with a 90 degree piston and trigger……..Usually.
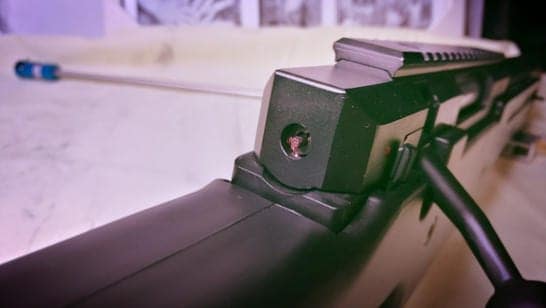
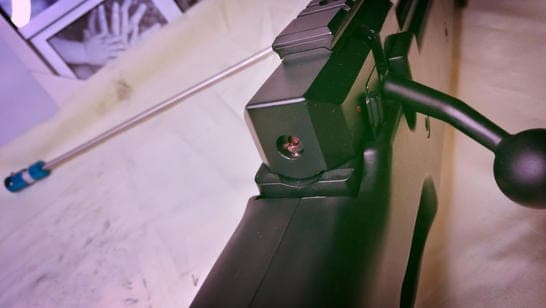
A good feature which works on this particular model is the cocking indicator, which on a lot of other clones does not work.
Build/Parts Used:
There are many upgrade parts available for the Type 96 models, available from a variety of manufacturers, for this build I used the below:
ASG AW308
Springer Customer Works S-Trigger
ZCI 6.02 499mm
Action Army Type 96 Hop Unit
Maple leaf Bucking
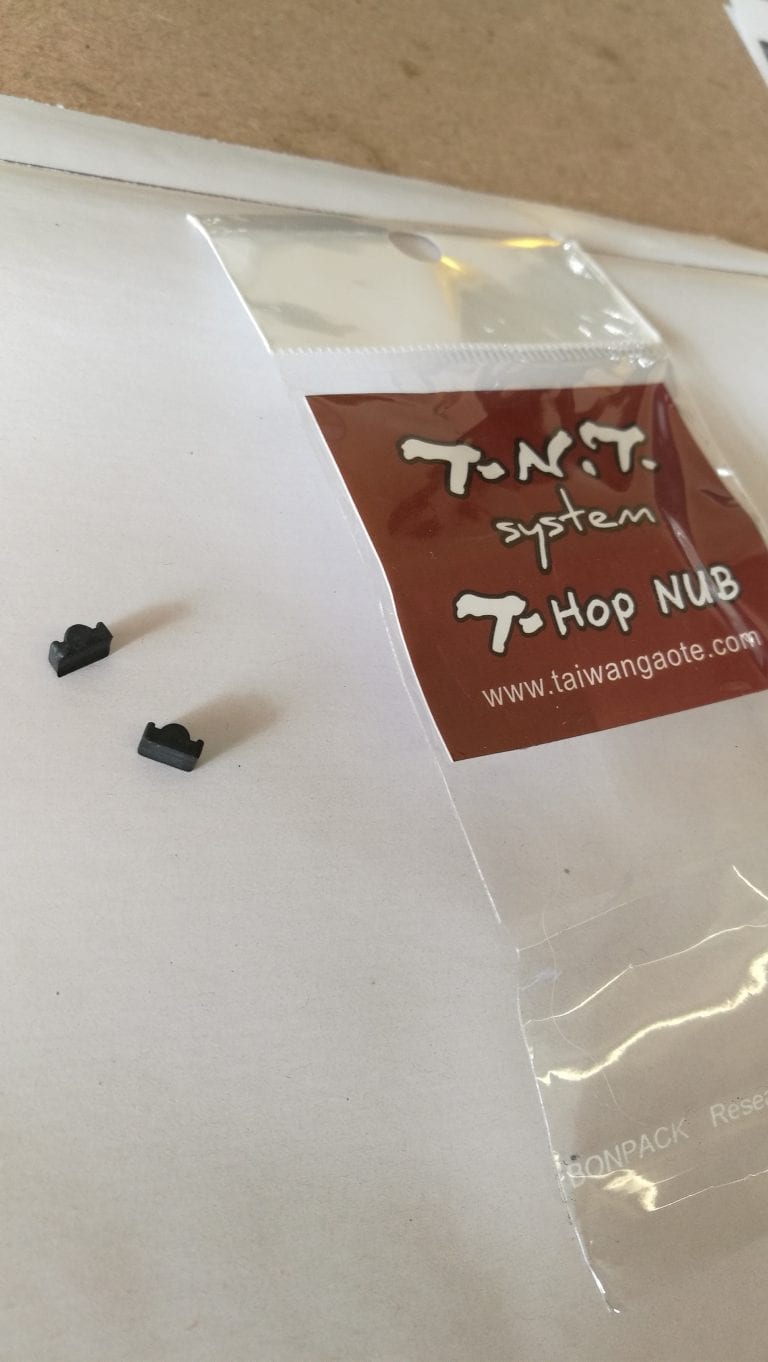
Maple Leaf Omega Nub
Laylax Type 96 Piston
Laylax Type 96 Spring Guide
The above parts are of a high quality, can be purchased within a reasonable budget and will help with accuracy, durability, consistency.
Disassembly/Installation:
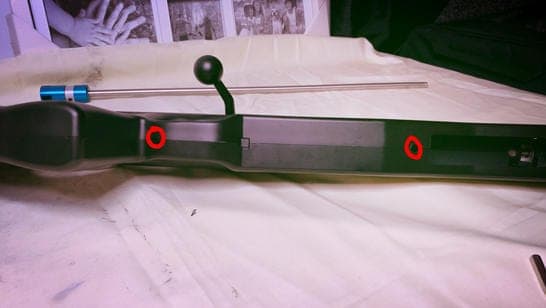
Firstly make sure the rifle is not cocked or loaded, then you’ll want to remove the two receiver screws so you can separate the receiver from the stock.
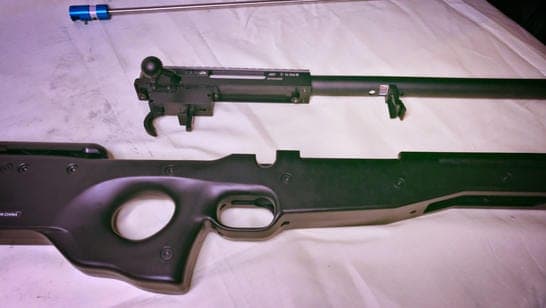
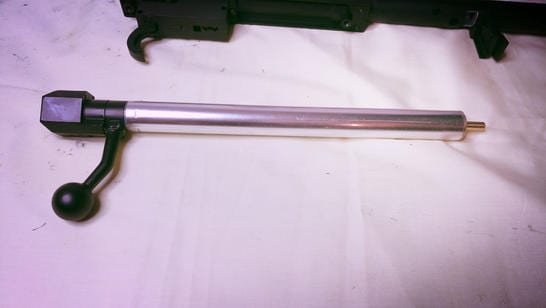
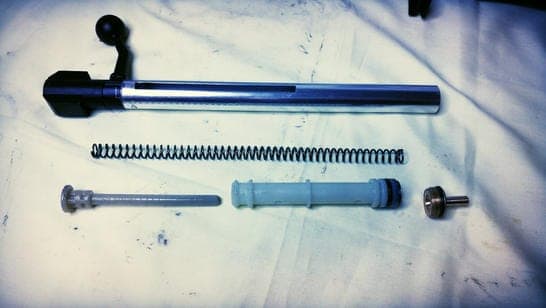
From here you can put the stock to the side as you won’t need it for a while. Once you’re down to the receiver, you’ll want to start with the cylinder upgrades. To access the cylinder you can pull down on the spring guide stopper and pull the bolt out.
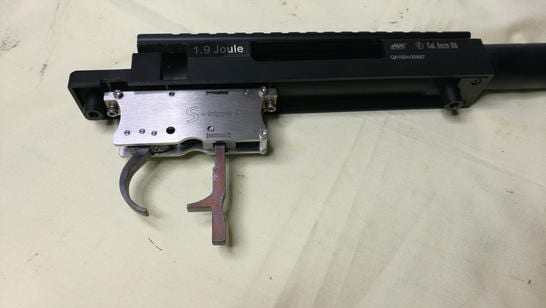
Sadly on this particular the trigger housing is plastic, which is why I opted to swap it out. On some models the trigger unit can actually last a long time at 500fps. On this rifle I don’t believe that is the case, but I’ll cover that more shortly.
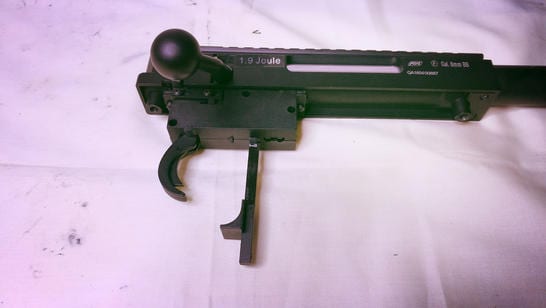
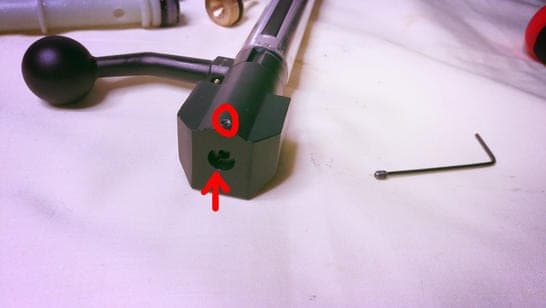
Once the cylinder is out you’ll need to remove the trigger unit itself which is done by removing the two below screws. When removing the cylinder make sure this pin doesn’t get lost, it’s very important!
Again on this model I was disappointed that ASG had opted for a 45 degree and not a 90, which is what nearly every other APS-2/Type 96 uses. On many of the other clones, you can run 450-500fps on the stock trigger for some time.
To access the cylinder internals, remove the cylinder head with some needle nose pliers.
The internals are the usual stuff you’d expect, covered in grease. The cylinder and cylinder head are fine for 450-500fps build in the short term.
They may last years, or they could last a few months. But I’d only replace them if needed, otherwise I’d suggest the Laylax/AA Teflon ones.
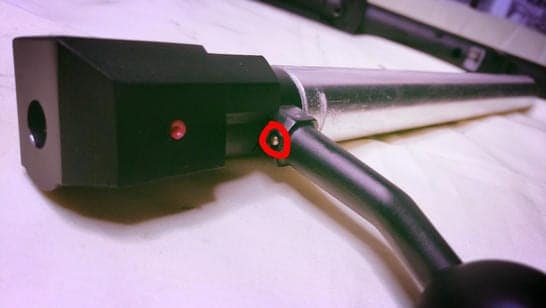
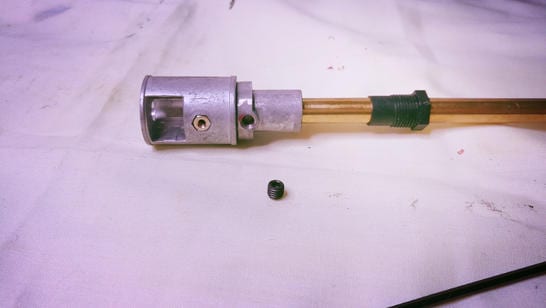
In the cylinder there is a rod which needs to be removed with most aftermarket pistons and spring guides, it’s used in the function of the cocking indicator.
To remove it you need to remove a small grub screw and then the main screw, which will expose a spring which you keep and then rod which you pull out.
With the cylinder internals removed, you can whip in the new parts, making sure to grease the spring and spring guide slightly and put some silicon on the Oring. As always PTFE tape a few wraps on the cylinder head threads for an improved airseal. Then put it to the side as we’ll install the trigger next.
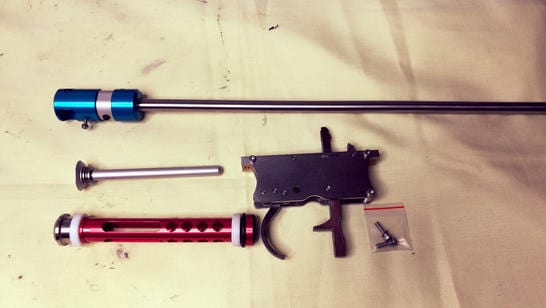
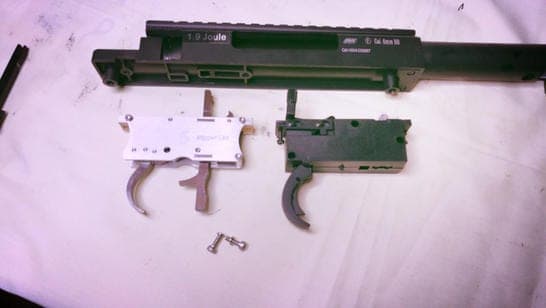
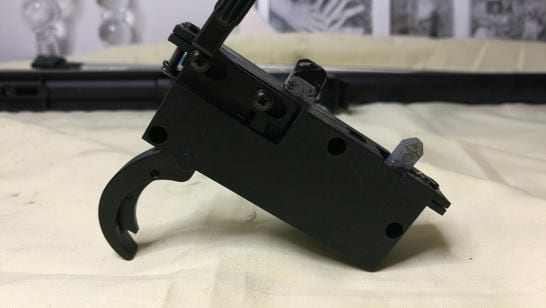
Installing the trigger is a simple task, just put it in place and screw it in. I opted for one of Springer Custom Works Prototype Type 96 triggers, simply because in my opinion they are the best triggers on the market.
With the trigger installed, cylinder internals installed you can put these parts back together and we can move onto the barrel and hop assembly.
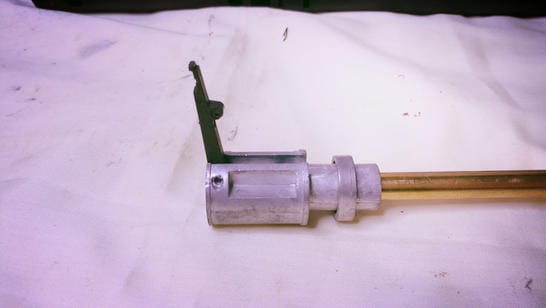
To get to the inner barrel and hop you first need to remove the mag release which is held in with one screw.
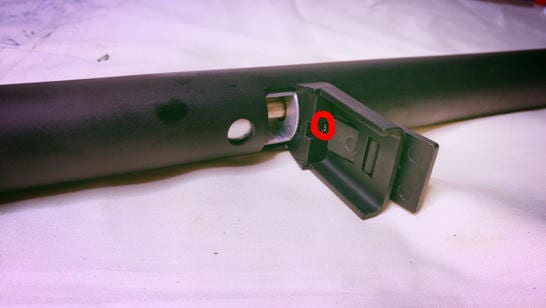
Then you need to remove the two small receiver screws.
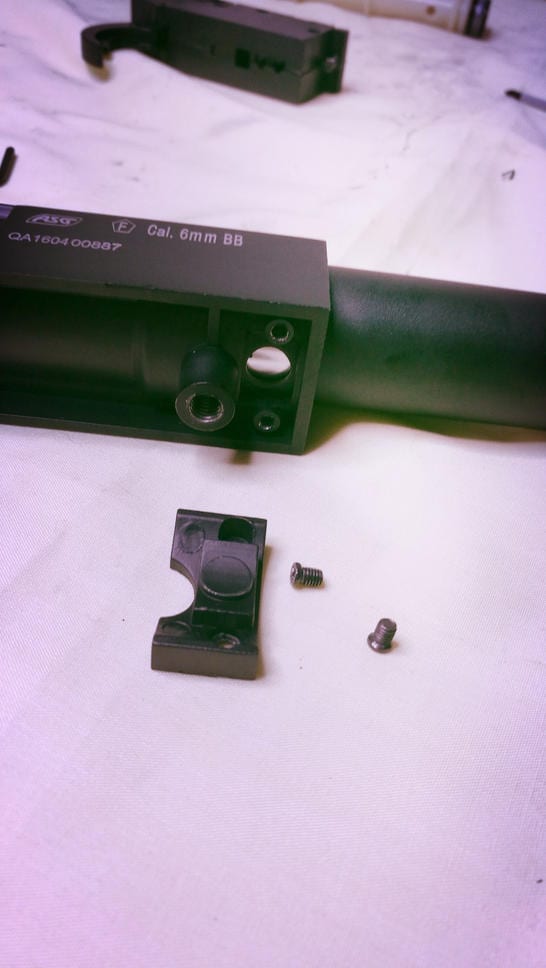 Once this is done you can slide the hop/barrel out from the outer barrel.
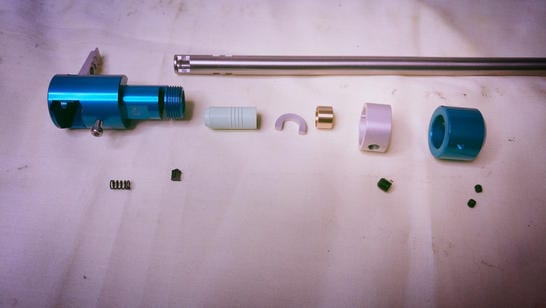
Firstly you need to remove the large black plastic screw, then the adjuster screw, then unhook the adjustment ring form the hop arm, lift the hop arm up and slide the barrel/bucking out.
The bucking is a bit like a VSR bucking, but it isn’t which is a bit of a pain, I believe Falcon and Action Army make a bucking. Though in stock form the rifle can hop heavy ammo and shoots well, the ability to take AEG nubs is a bonus over other clones.
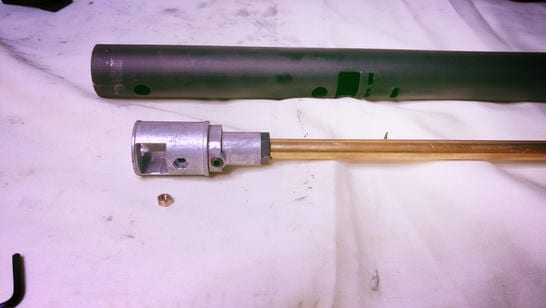
The barrel is a typical Type 96 barrel with it’s cuts and the addition of the metal ring, but actually good quality as far as stock barrels go.
With this barrel removed we can install the Action Army Type 96 chamber, Maple Leaf Bucking, Maple Lead Nub and ZCI barrel.
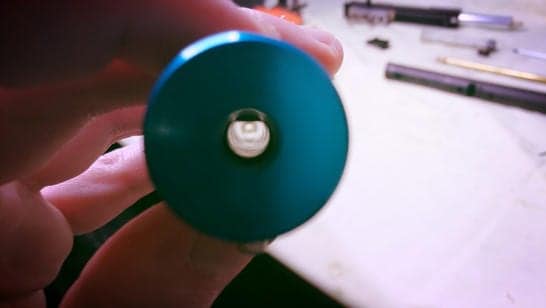
The AA chamber comes with instructions, so I won’t explain it here as it’s really simple. My nly tip is make sure that you put silicon on the outside of the bucking as they can be tough to slide in.
Once you’re happy with the bucking/nub alignment, you can add some electrical tape barrel spacers and then re install the unit to the outer barrel and install the mag release.
ASG AW308 Build Final Thoughts:
This build is currently in progress until I decide what to do. My thought so far are that I’m a little bit disappointed with ASG’s delivery of this rifle, which is a shame as they did a good job on the proline M40a3 and the gas M40a5, everything on this is slightly of spec and considering it’s more expensive than the WELL clones, at this stage I’d have to say I wouldn’t be suggesting this rifle to friends/customers just yet… however this may change once the build is completed.
Externally the quiality is better than most other clones and the QC appears good, but just the odd dimension change here and there makes it an unusual rifle.
Do to a lapse in memory I forgot the stock cylinder head wouldn’t fit in the AA chamber, so I’ll have tho grab the AA cylinder set.
Purchasing the cylinder set isn’t the end of the world as it’s a worthwhile upgrade. You could stick with the stock hop chamber and polish the barrel, upgrade the bucking etc
The trigger end of the rifle is brilliant though, bolt pull is smooth, return is effortless, compression is great. I can’t test beyond that until I get the nozzle and unit to mesh together.
I’ll update this post once I’ve get the rifle fully working with the parts.
links:
Parts: Empire Airsoft
Rifle: ASG
Other Guides
Remember guys, if you’ve enjoyed this post or any of the other content I’ve put out, please check out my other platforms and consider becoming a Patreon