JG Bar10 Gspec Build: Part 2 Accuracy Range
Introduction:
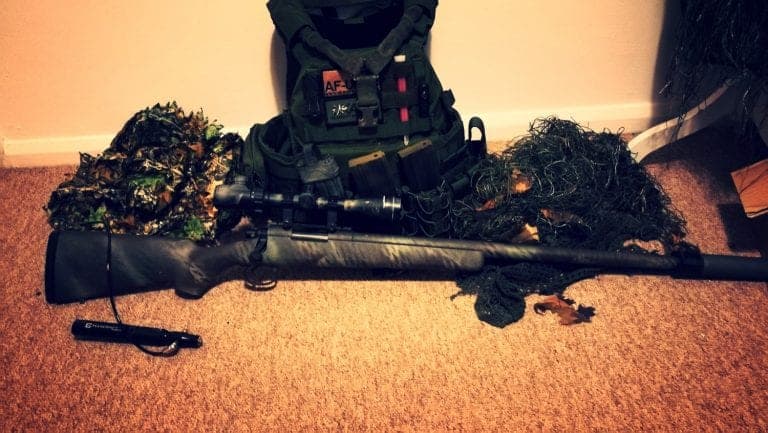
So with part 1 done and your JG Bar10 Gspec now upgraded and ready to shoot at a nice FPS. Let’s move onto the most important part of an Airsoft Sniper Rifle, the range and accuracy.
As this build was more of a budget build, I’ve opted to keep using the stock chamber, but swap out the inner barrel, bucking and hop arm.
Disassembly:
Getting to the inner barrel and hop assembly is extremely easy, requiring only a few steps.
First if you haven’t already, you’ll need to separate the receiver from the stock. This was covered in part one.
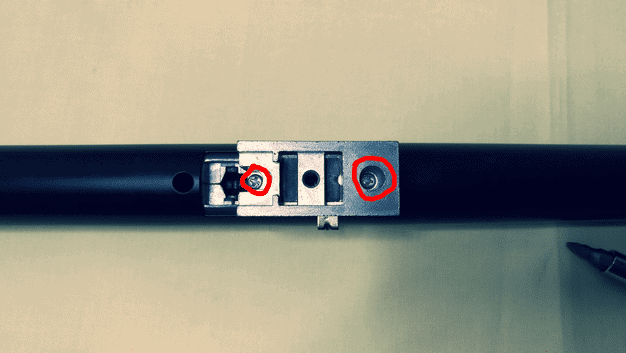
Secondly you’ll need to remove this screw below:
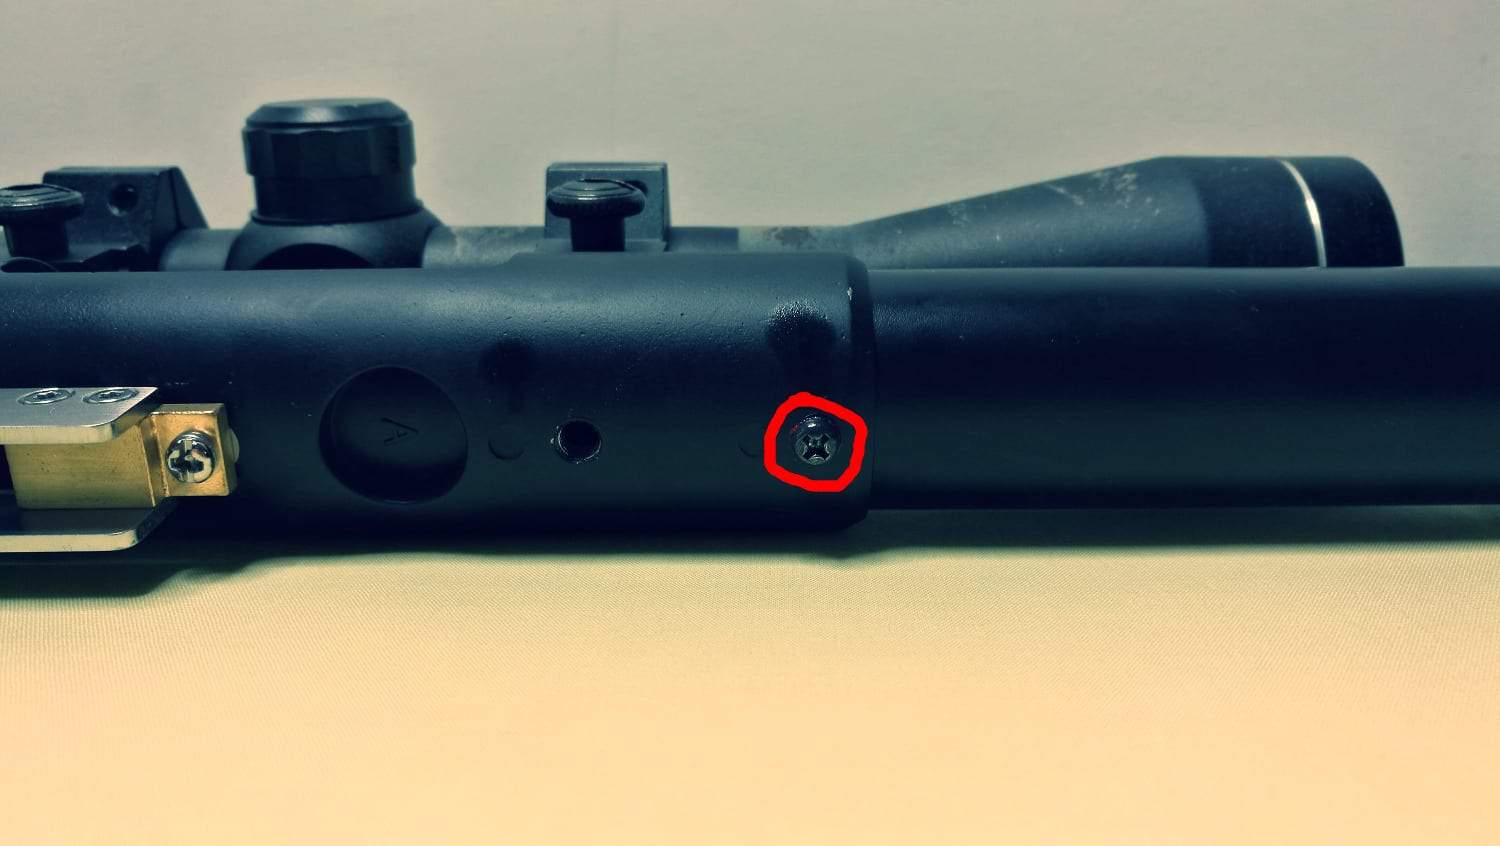
On some models you may also need to remove this screw, on my JG I didn’t.
Once you’ve removed these screws, you can then proceed to unscrew the outer barrel from the receiver.
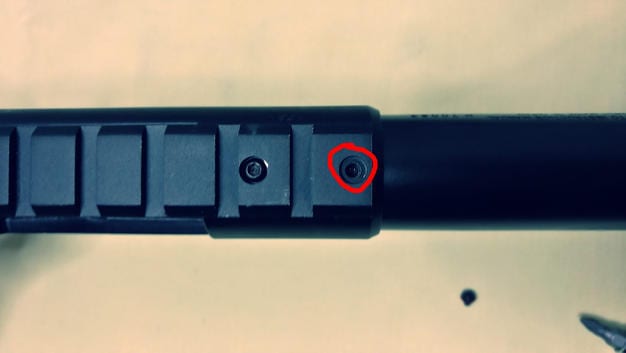
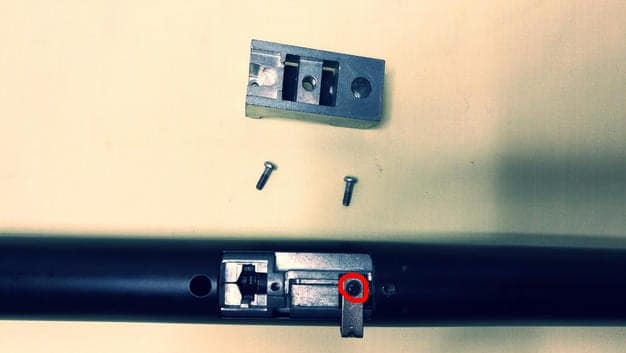
Next you’ll need to remove the hop up chamber block/magazine block, which is done by removing the two screws highlighted below.
Finally you’ll need to remove this little screw and plate, be very careful not to cross thread this as it’s very fragile on these models.
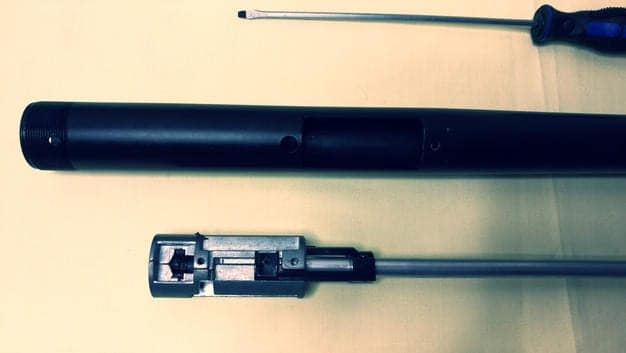
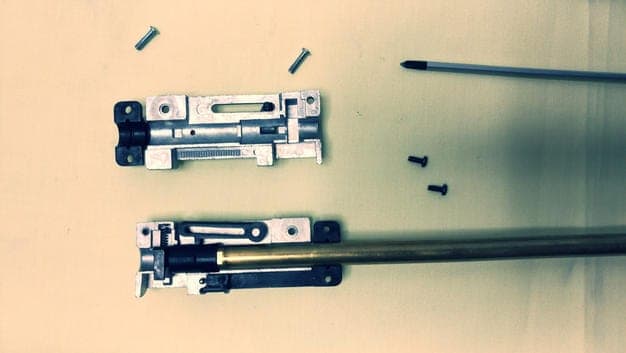
Now you can slide the inner barrel and hop chamber out from the outer barrel.
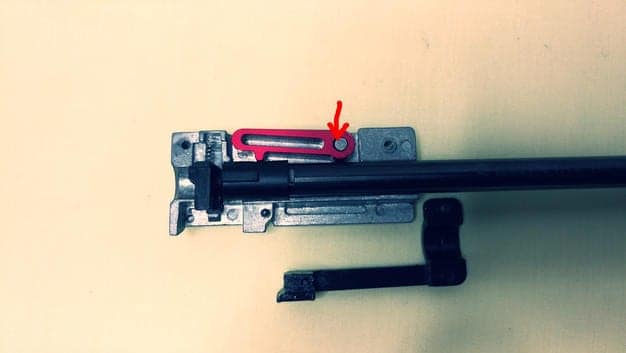
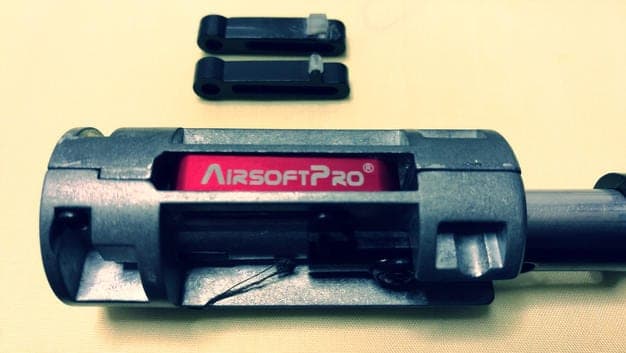
From here you’ll want to remove the screws highlighted below. There are four in total, two on the chamber and two on the adjuster arm.
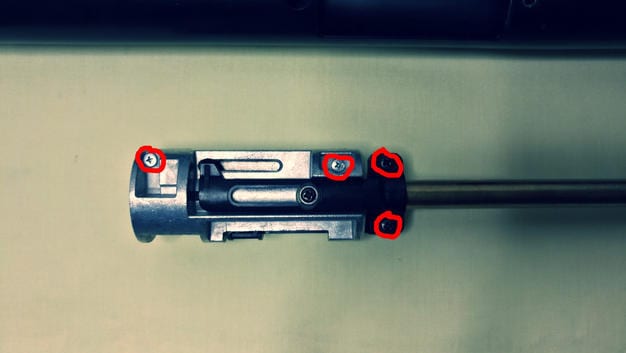
Once these are removed you can split the chamber apart to reveal the hop bucking, hop arm and magazine feed. At this point one half of the adjuster will come off and the other on the chamber, you can leave this one attached.
Upgrade parts used:
For this JG Bar10 Gspec, again being a relatively low-medium budget build. I opted to keep the stock chamber and work with what I had.
Upgrade parts:
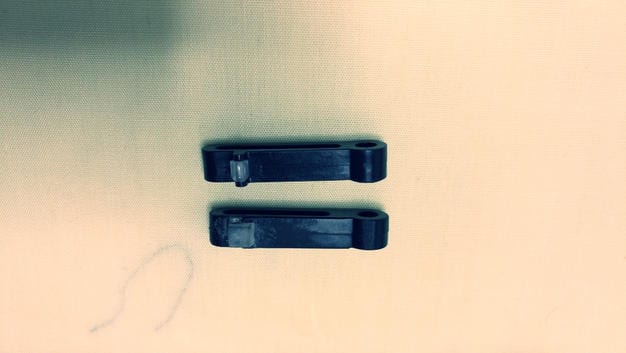
Airsoft Pro Hop Arm – This is a cheap hop arm, the QC can be a bit hit and miss at time and I’d recommend the new ASPUK “Sniper One” going forward.
Stock TM Bucking – The stock TM bucking is great and works really well, other buckings which work with the bridged barrels are the PDI W-hold and Nineball. The only problem with Nineball is the QC is terrible and it’s hard to get one that’s good, however when you do they are great.
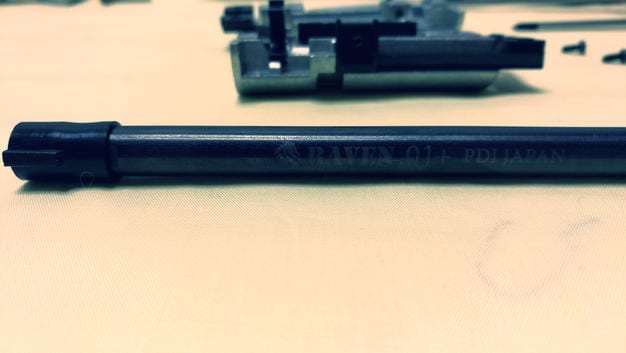
PDI Raven 6.01(on a TM, the stock barrel is fine) – X fire had a sale on this so I picked it up cheap. If you had a higher budget I’d suggest one of the normal PDI barrels or anything by EdGi.
Installing the parts is very easy, take out the hop arm and the inner barrel. Install the new bucking on the new barrel, making sure everything lines up.
A DIY tip here is the add PTFE tape the end of the bucking away from the end where BB’s enter. Adding a wrap or two can help with air seal, which in turn makes your gun more efficient and consistent.
Then install the hop arm, things to note here, the QC on this gun and the airsoft Pro hop arm aren’t the greatest so I used an AEG shim on the post the arm sits on as it was sitting to far over one side.
This varies on every gun, but AEG washers can be put on either side to ensure a snug fit and central alignment. A DIY tip here is that if you don’t want to pucrahse a new hop arm you can cut a piece of BIC pen and fit it between the two fangs on the stock hop arm. Doing this will help with a more consistent hop and ability to lift heavier ammo.
Install the barrel making sure the “wing” on the bucking sits in the cut out in the chamber.
Once everything is lined up, gently make sure the magazine feeder piece is in correctly and the unit closes, do the 2 chamber screws up about ¾ of the way.
From here you’ll have one of the hop adjuster arms left over, you’ll want to position this back in the chamber, once seated ensure the magazine feed piece is still sitting in place and continue to tighten the screws. Then install and tighten the two screws on the hop adjuster.
What I usually do here is use an Alan key to push the magazine feed piece up and adjust the hop to make sure it’s pushing down on the bucking and that it’s coming down evenly through the hop window. If it’s too much on one side, then you’ll need to take it apart and adjust/add more shims.
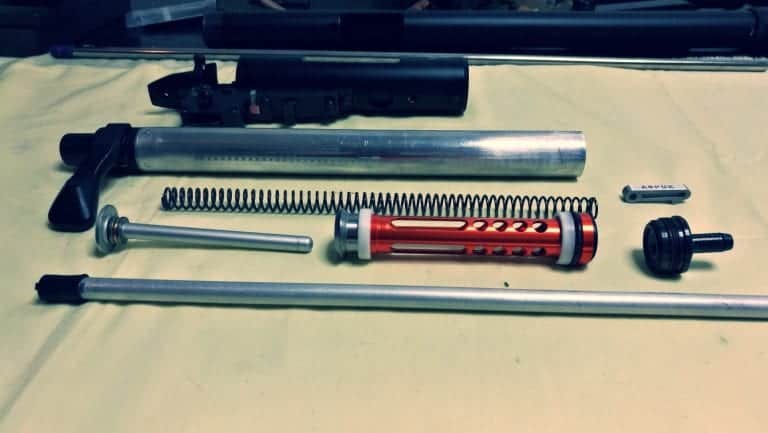
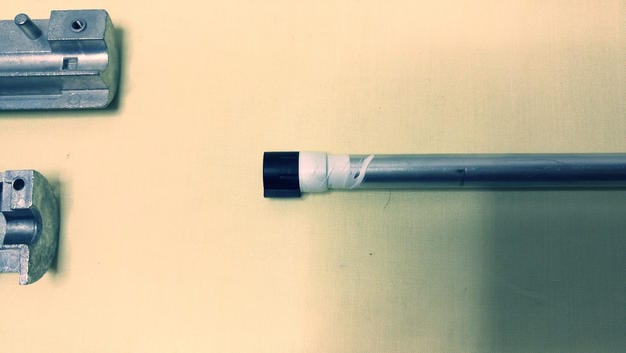
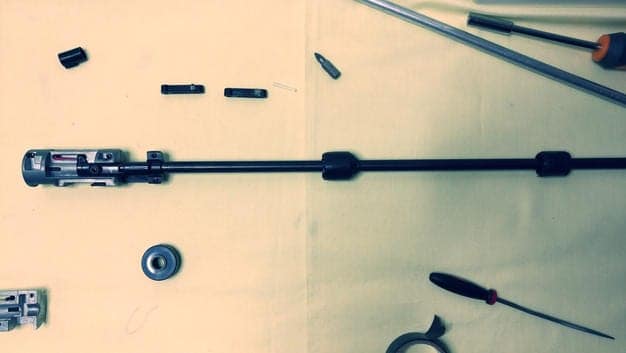
Once you’re happy with how everything is sitting, you can make some DIY barrel spacers out of electrical tape, evenly space them up the barrel. On a Gspec barrel 2 or 3 is usually fine. You’ll need to test them to make sure they are snug, but not so tight they won’t fit in the outer barrel. (Note this is my VSR 10 Pro barrel as the Gspec hadn’t arrive when I originally wrote this, hence why some parts are different)
With everything now ready to go, you can slide the chamber back into the outer barrel. Making sure everything lines up.
You’ll want to install the small adjuster plate back into the hop adjuster arm, again making sure not to cross thread it.
Next is the hop chamber block, again this is simply put back in place and the two screws tightened.
Now you can install the outer barrel back into the receiver, making sure to align the small screw in the bottom of the receiver with the cut out in the outer barrel.
Reassemble the gun and you’re good to go.
The new bucking will take some time to bed in, as will things such as the spring, bolt sears etc. After a few hundred shots everything should bed in nicely and if you’ve lubed and PTFE’d everything I’ve suggested you should be getting a nice consistent FPS Variance of +/- 1 /2
Final Thoughts on the JG BAR10 Gspec:
As noted in part 1, I had some QC issues with this gun. I put this down to it being a budget version (which I didn’t know existed). The normal version we see in the UK is a bit better and as such you can run the normal cylinder and cylinder head.
Overall the JG Gspec / JG Bar10 are good starting platforms; they require a bit more tinkering than a TM just because of the difference in QC. That said, they are cheap, for the most part work with 99% of TM VSR 10 parts and can perform really well if you invest the time and money.
This budget build would still give a good performance in terms of durability/range/accuracy etc. For someone new to Airsoft Sniping or who just wants a cheaper build which will give them an edge over the AEGs on the field and an overall healthy performance, this is certainly one of the many upgrade paths you could go down. Things like the bucking and barrel are down to personal preference really.
You could opt for a 45 degree setup instead of the 90, saving you money on the piston and Springer Custom Works Trigger.
However you’ll have a heavier bolt pull/return and you will end up having to replace the sears; it’s just a case of when.
I hope this was a good read and you enjoy it, if you did please remember to like and share the FB page and subscribe to the blog.
Links:
Upgrade Parts: Empire Airsoft
Remember guys, if you’ve enjoyed this post or any of the other content I’ve put out, please check out my other platforms and consider becoming a Patreon